Saturday, April 30, 2016

April is Amulet month!

At least it is over at Art Jewelry Elements.

You can check out the original post here.

I was one of the lucky winners.

This sweet little thing came in the mail....


Now, I have to admit....the whole reason I signed up was that I wanted to see one of these amazing amulets up close and personal.

So imagine my delight when I was contacted that I had won.


I was even more delighted when it came.

It is even better than I hoped.

My head began swimming with possibility.


So the first thing I did was to get out my 3 favorite materials to work with: silk strips, polymer beads and waxed linen cord.

And quickly, this came together.


The amulet is predrilled on either side but the cork was not so I tied my waxed linen cord through the holes on each side and this allowed the cork to still fit back on.


I love the colors of the one she sent me....


It goes perfectly with my handmade polymer clay beads...


I just did simple knotting with the cord and silk strips.


I prefer a necklace that is adjustable with the silk cords.


So there you have it....

My amulet reveal.  

I cannot wait to see the rest.  


Want to see what everyone else made?

Check out each of the other blogs in the hop below.


Thanks so much for stopping by...


Thursday, April 28, 2016

Clay Rings

I tend to be a necklace girl.

When I am creating jewelry, it is often a necklace if I do not plan ahead.

So every now and then, I make myself create other pieces.....often bracelets or earrings.

The things I almost never create are rings.... though those are what I wear myself the most.

I did play around with some fun artistic polymer clay rings...


Whoops.....

Can you see the hair on the bead?

In a house with pets, sometimes hair is another food group/common element...


These next 2 were done with Swellegant paints and patinas.

If you are not familiar with them, you need to check them out.  

The paints are infused with real metal particles.

Those particles react with the patinas to produce fantastic looks.


These rings all used the wavy wafer beads I made from polymer clay.  

I used my husband's torches to ball the ends of the steel rebar wire.

I added the bead and then balled the other end.

Then I gave the wire a few quick turns around the ring mandrel.

Easy peasy.


I really should make rings more often....

What have you been up to lately?

Thanks for stopping by....

Wednesday, April 27, 2016

Workbench Wednesday... T-Shirt Yarn

One of my favorite materials is t-shirt yarn.

I did a post on it earlier here.

 I also did a post on Hometalk.

Some of the yarn was made from t-shirts that were already destined for the rag bin.

Some t-shirts were purchased at the local thrift store for about 50 cents each on half off day.

My daughter and I stocked up on different colors. 

 Our cart was full and the lady behind is kept sighing.

We were chatting with the thrift store staff while we were checking out.

When my daughter went to put the cart away, the woman who had been behind us approached her and asked what we were doing again....

My daughter told her and the lady said it sounded cool.  

It made us chuckle.

This week on the workbench, I was cutting the t-shirts on my back porch workbench and making yarn for some yarn projects.


I really liked the colors in this group.


The t-shirts were super soft so this yarn is extra soft and stretchy.


I love that this time of year my workbench may be inside, outside or a combination of both....

I hope you have something on your workbench right now too...

Thanks for stopping by...


Monday, April 25, 2016

Mermaid Crown

I am fascinated with crowns.

Which is sort of funny because I do not consider myself a diva kind of girl.

I guess every girl has a secret princess inside.

So I wanted to take a hand at making my own mermaid crown.

Here she is....


Talk about fun....


You know when you get to use seashells, pearls and glitter that it is going to be a great time....


The tulle added just the touch I was looking for...


And I am in love with the graphic appeal of a starfish...


I am drawn to any piece that has starfish incorporated...


I love the additions of the little bits of tulle here and there....


I need a pretty mermaid model to wear it...


I used the finest glitter....

Love the tiny shimmer of it...


This was a great use for all the seashells I am always buying at yard sales and the thrift stores...


Truth be told, I have many jars filled with tiny (and not-so-tiny) seashells.


So I have my own little piece of magic now...


It is a bit heavy to actually wear, but it brings me joy none-the-less.


How do you celebrate your inner princess?

.
Thanks for stopping by....

Sunday, April 24, 2016

Cleaning the Greenhouse....

Seems like it has  been a very busy spring.  

I knew it would be so I decided to tackle one project at a time.  

The first was my green house.


A couple years ago I shared my clean up with you. 

Well, a lot of stuff got piled in here last summer and fall.

Watch out!

Scary!


So the first weekend I carried everything in the middle out.

Sadly, I did not get done.

A storm was coming with 50 mile an hour wind gusts and rain so I covered the pile and hoped for the best.

I did not want to have to carry it all back in and back out again...


I had piled some pots to donate behind my shed.

The winds tossed them about a bit...


Round 2!

I had put some things back in that I did not to get wet.

So I started by carrying them out again....


I did make a couple dents in organization last weekend.


My husband always suggests going vertical when you need more space or storage.

Those little chairs were made by my great grandfather and I used them as a child.


My sweet husband helped to organize and move our tools.

My goal is to keep it neat but just in case....

The tools will be ready to grab right inside the door.


The space on the floor in front of them will be kept clear except for my little rolling cart.


Work continues...


Now that is a welcome site!

These shelves have not been clean in forever....

They are ready for some plants to be started...

I am thinking herbs this year...


I cleaned off my display shelves...again.

Pared down a few things.

It could use another go around for cleaning out but it is getting better.


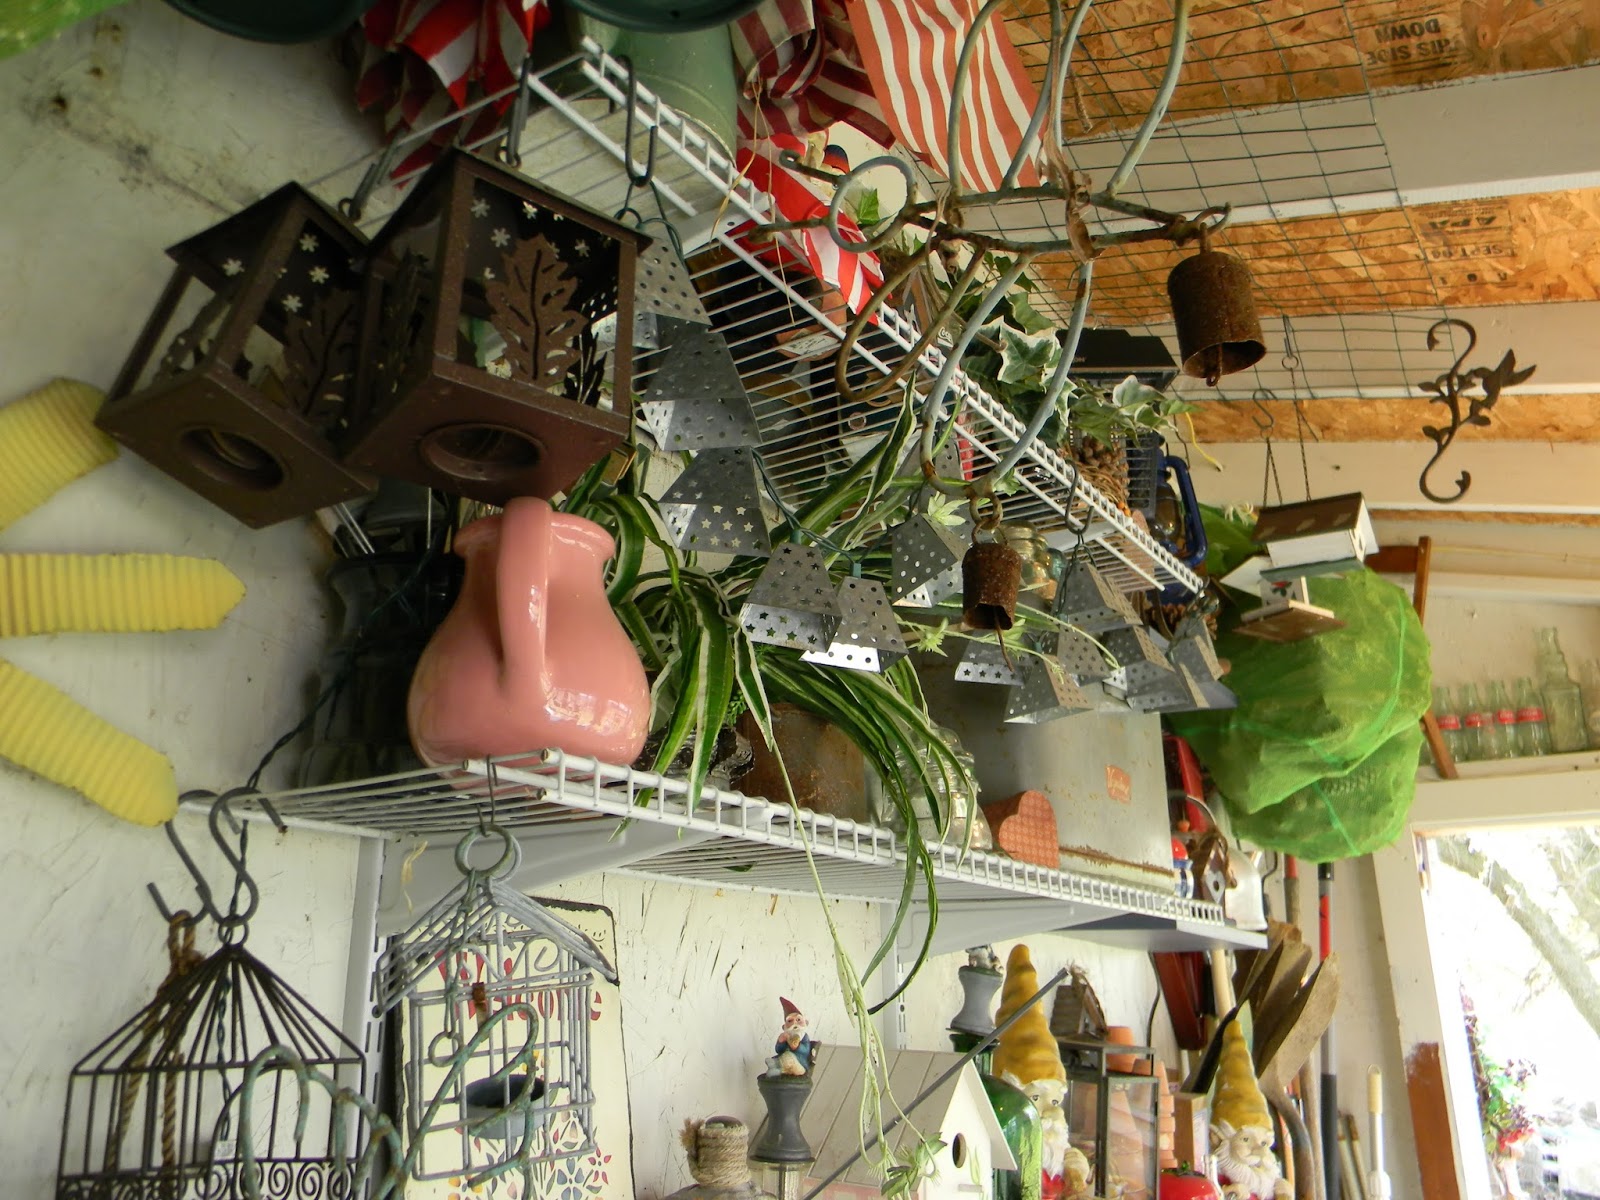
We save pitchers and bottles for flower arrangements for the fair.


Again, to maximize storage, go UP....


The plant shelves look better.

Underneath I got rid of a bunch of stuff. 

 Now my extra glass scraps are there along with some pots.


This wall is much better. 

 I sorted through my books and kept my favorites.

There is a great mix of informational and some fun junking books.

My hat collection from high school is in here on the wall.

I also have my flower frogs on the shelves.

The green laundry bags up high hold light botanicals that I collect: pine cones, gourds, pieces of bark....


I gathered most of my clay pots in one spot.

Now they are handy and lovely under the potting bench my husband made me about 20+ years ago.


This is the cleanest the top has been forever.

Room to plant.

Or dream...

Or ponder...


Here are the display shelves from the other side.


I don't waste any space...

Above the door there are a few glass bottles.


I ended up putting one of the chairs I showed you before back here.

When I hung up some more bags of pine cones, the chair did not fit.


My chicken wire dress forms will sit here until I get them out into the garden.  

I have to start cleaning out the flower beds next.


Later I will show you a few of the collections that get stored in my green house.

Thanks for stopping by...