Friday, September 26, 2014

Craft Lightning 15 Minute Craft..Sweet Pocket Treat Tags

I have long been a fan of Angie at  Country Chic Cottage.

So when I had the chance to sign up to participate in Craft Lightning 15 Minute Halloween crafts with her and Carolina at 30 Minute Crafts, I signed up before I knew what I would be doing.

I had several ideas and finally decided on quick Sweet Pocket Treat Tags.

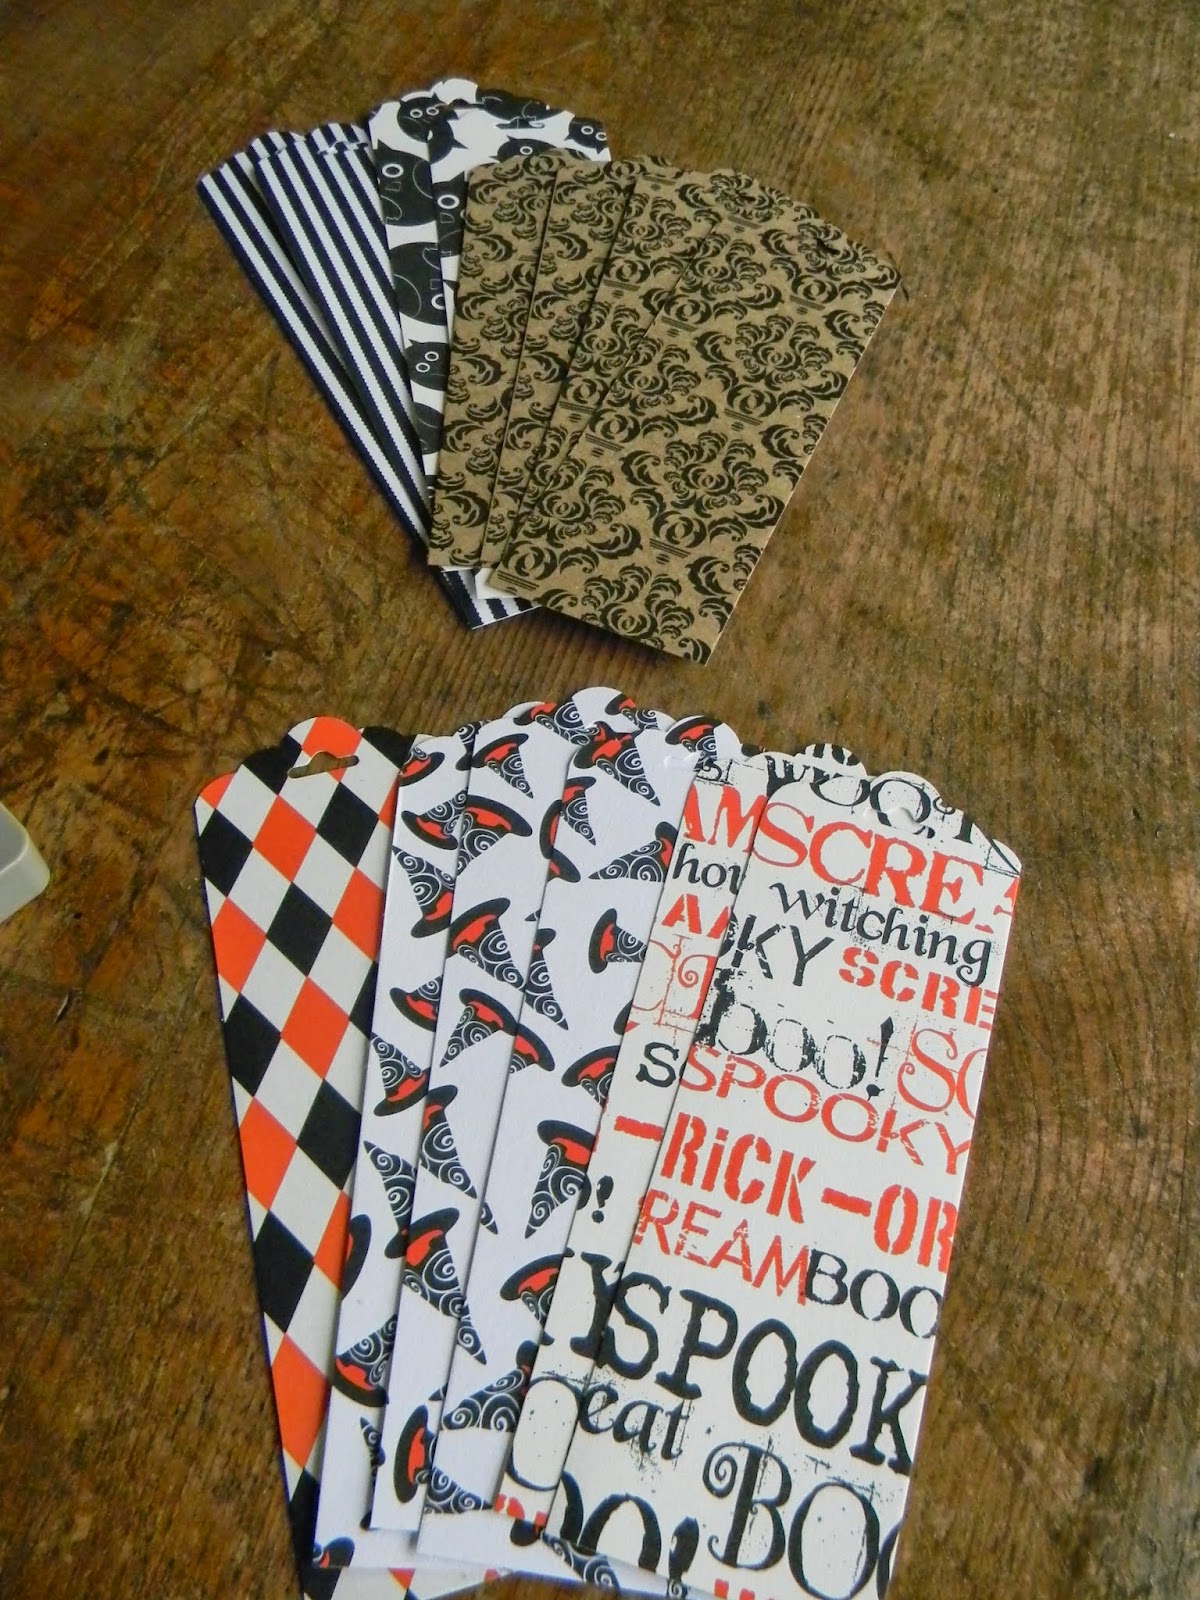
Start with some cool Halloween papers.

I bought a sweet scrap pack at A.C. Moore last year so I pulled out a few different designs.

I also used my paper cutter and an awesome Tag Punch from Stampin' Up.


Trim your paper into 2 inch wide strips so they will fit in the tag punch.

You can vary the length depending on how deep you would like your pocket.


Punch the tops of your tags.

To be sure everything is straight, be sure to flip it over and check the window on the back.


How cool is that?

One punch and the tag top is ready.


I did several quickly.

I would always rather make multiples of something in a few extra minutes, rather than having to go back and redo steps.


I used my Stampin' Up Simply Scored Scoring board.

I love that thing....

I marked some tags at 2 inches and scored across the bottom there.


Longer strips got scored a little longer.

That way the pocket will be deeper.


I folded over the bottom tab.


I used My Darice Double Sided Permanent Tape roller next.


I carefully ran the tape right along the edge of the tab.

Remember, you want the pocket to be wide enough to actually hold a goodie...


Next is the fun part.

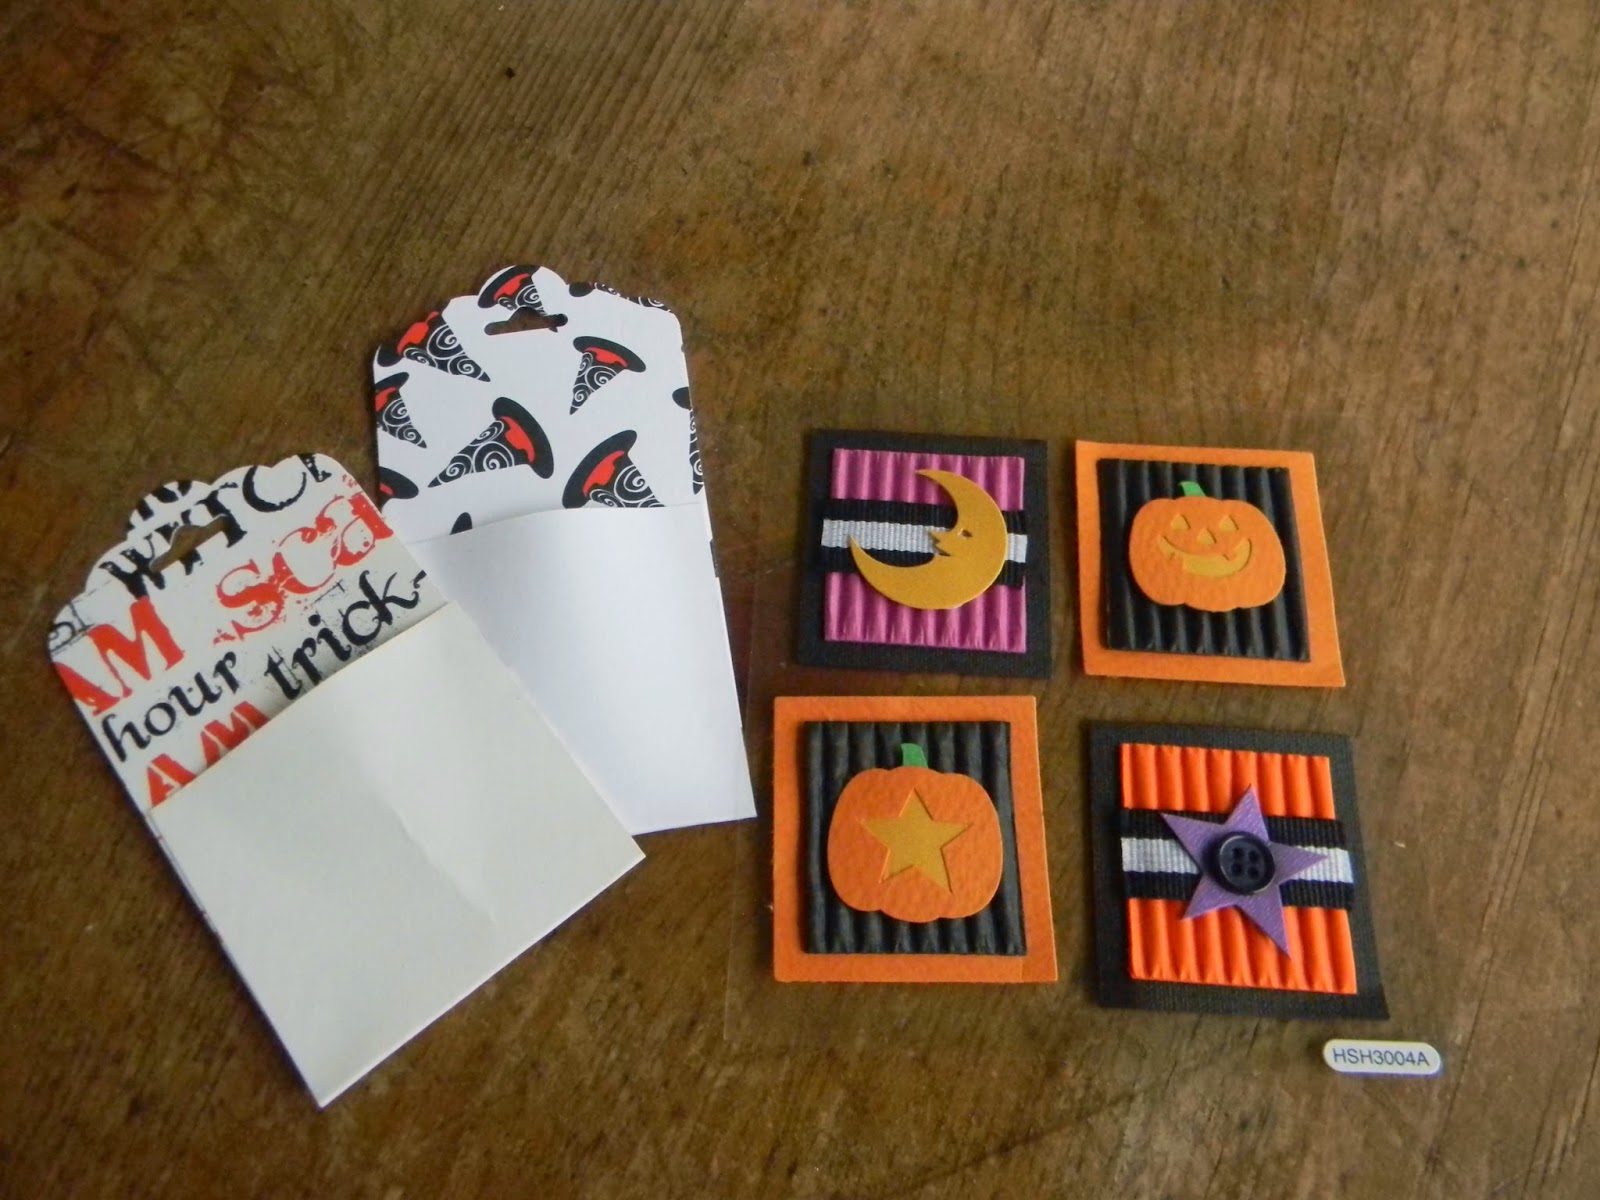
Add whatever stickers or embellishments you love.

I had a handful of old three dimensional Halloween stickers that were perfect.


Stick them on.


Again, I did several in a minute or so.


This next part is fun too...

Find any fun fibers, ribbons and yarns you may have.

This pile has all been picked up this summer while thrifting....


Cut your fibers and add one or more to each tag.


I am loving the brown craft group.


Lastly, add a few treats and goodies.

Air Heads fit.


So do Jolly Rancher sticks.


Even Andes Mints.


For family and people you really like....

Cash might be the best gift of all.


You can easily make several in 15 minutes, just gather supplies first.

I hope you are inspired to make some of your own.

Head over to Craft Lightning for a whole week's worth of fast Halloween crafts.

Thanks for stopping by....

Linking up with these great blogs...

Tuesday, September 23, 2014

Swap and Tell #6


Last week I linked up to join the Swap and Tell #6 at Tarnished Royalty.

There were lots of great things to choose from but I am crazy about Frozen Charlottes and a long time admirer of Donna from Distressed Donna Down Home so I hoped to swap with her.

She agreed.

Yay! 

I sent her 6 of the Rose bangles made from old sheets that I shared here.

Her box arrived...

In a matter of days...


Don't you love that moment of anticipation when you first open a box?

I actually opened this and then made myself stop to go get the camera so you could see too...


Donna had the perfect mix of safe and pretty packaging.

The plastic bag is a great idea just in case the glass jar would break during shipment.

No worries, though.

It arrived safely.


Such pretty tissue paper.

Just perfect for what is wrapped inside.

The seam binding and beautiful hand stamped tag are removed.

I will use the seam binding for another project. 

 I don't have any of my own in black.

Under the pretty tissue paper was bubble wrap for safety.


On the back of the beautiful tag is a sweet note from Donna.


It only took me a few seconds to dig into this fun jar of goodies.


Lots and lots of lace. 

Three different kinds.

My favorite is the cotton lace.

I know it will take dye or stain beautifully.

Sweet vintage antique buttons in creamy whites.

And that frozen Charlotte of course.


There is so much future fun to be had here.

That jar was packed full of lace.


I collect Charlottes in lots of sizes.

I love them.

I think they are beautiful when added to art pieces.

But I can't bear to actually add them...

so I make molds from them and then make resin and clay Charlottes that I can add without the guilt.


I loved this swap and tell.

I hope Donna is as thrilled as I am.

Her items were beautiful, arrived quickly and were beautifully packaged.

It doesn't get any better than that.

Thanks Donna.

You can see her blog Distressed Donna Down Home.


It is full of gorgeous vintage finds and handcrafted treats.

Or follow her on Pinterest.

Or follow her on Facebook.

And thanks for stopping by...


Monday, September 22, 2014

Dyeing Silk Strips....

I love using silk strips in my work.

Silk is crazy expensive...

So I buy silk clothes at the thrift shop and tear them into strips.

I have a large variety of colors and textures.

  But I wanted to play around and see how I could make them more me...


Enter RIT Dye!

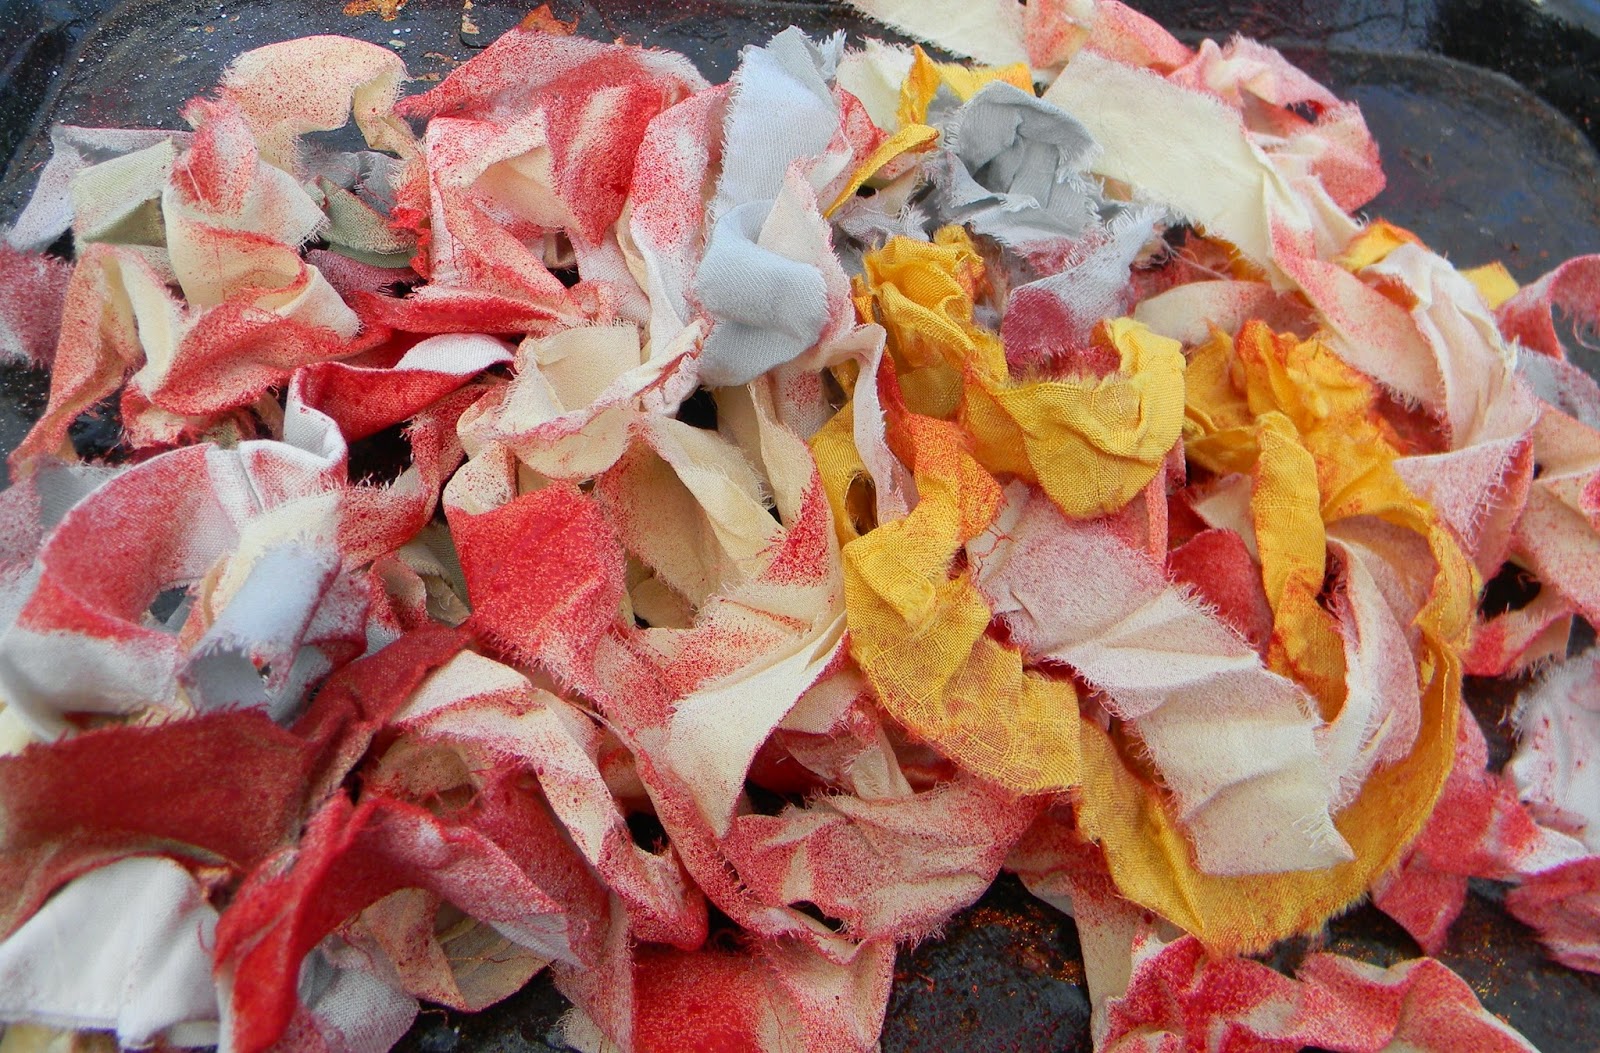
I used the Orange Color Perfect kit with the sprayer.


I sprayed the silk on a plastic tray.


Once it dried a bit, I turned it and sprayed it some more.


I just kept doing that until it was mostly sprayed. 

 I did not want all over color.


Now the hard part...

Patience..

Waiting for it to dry...


I wanted to try some of my homemade alcohol ink too.


Same method...

Spray...turn and spray some more...


This looks a little lighter than the Color Perfect.


This where I forgot to take pictures...

Once dry, I rinsed the silk under cold water til it ran clear.

  Then I squeezed it out very well in a big ball and let it dry.

I have been trying for awhile to get that crinkly texture to my silk strips.

This finally did it...

Here are some finished pieces I used them in...


I am planning another post on these necklaces...


I adore the way they turned out...


I get the same joy I did from the other etched bullet casing necklace I showed you.


These little vials are capped with shotgun shells....

Really!

How cool is that?


If you want to make your own, pick up the Autumn issue of Belle Armoire magazine for complete instructions...

on newsstands now...


That is just the beginning of what these dyed strips can become.

I highly recommend giving it a try yourself...

I will swap one of these necklaces over at Swap and Tell  at Tarnished Royalty.

Thanks for stopping by...

Linking up with these amazing blogs...


Sunday, September 21, 2014

A Rolling Cart Makeover


My neighbor periodically rolls into the driveway with goodies in the back of the truck. 

 This summer he pulled in with this ratty metal cart in the back which I quickly took.


It was covered in contact paper which someone has spray painted green.

I picked my paint colors and did not want to ruin the look of the finished piece with contact paper lines.

So I began trying to peel the paper off.

Not going well...

I spent about 30 minutes and only got off about  6 x 8 inches of contact paper.

I was even using a razor blade to get under it.

Now here is a killer tip for removing old contact paper.

Leave it in the direct sun for 30-45 minutes.

Now start to peel it.

After warming in the sun, I was able to remove all the rest of the contact paper in about 15 minutes.

Once warm, it easily peeled off in big sheets.

Those green strips were the metal, not contact paper.

So first I painted the posts in the corners.

I used Krylon Color Master  Paint + Primer in Almond.

I did 2 coats.


Then I used newspaper and painter's tape to tape off the posts and wheels.

You can see my daughter's tin ceiling tile from its makeover
in the background.

We both painted the same day.


Then I sprayed the shelves with several light coats of Krylon Color Master Paint + Primer in Island Splash.


I love that color!


I especially like that the paint and primer are all in one.

  I like a quick project.


Then I pulled off the newspaper and painters tape...


As much as I love the colors, I feel like it is not quite where it should be yet...


Break out the DecoArt stencils.

Their new line is my favorite...


A little bit of painters tape and some chalky finish paint in Primitive...

Here is my confession...

I am stencil challenged...

I think I load too much paint on the brush or swirl it too much or something.

So I am feeling some apprehension at this point...


I can't really tell with the stencil on still...

Deep breath...

Here goes...


Hey!

Not bad!

I love this stencil!


There is some texture where the cart was a little rusty.

You can see it under the paint but I am still pleased.

It looks so much better.

I wanted to make it so the bottom can be hidden storage.

I took a burlap coffee sack my daughter brought me and cut it to fit on the cart.

This was a No-Sew project.


See  how I just cut the bag and then used clothespins to clip it together....


I love the makeover.


A quick couple of coats of Krylon Clear in Satin to protect the stenciling.


Now it is all ready for whatever I want to use it for.

See it on the back porch here...


I think it is going to move around quite a bit...

Thanks for stopping by....